In part 1 of this article on recon-ng we covered the purpose of the tool together with the main features, usage syntax, and some examples of core functionality. In this, the second part, we will cover further examples of how recon-ng can be used for intelligence gathering.
Demonstrations
6) Managing API Keys
For this example we are going to use the service BuiltWith that has a free of charge account and API. First of all we need to search for and install the associated recon-ng module:

Credentials or Keys for third party resources (modules) can be managed using the ‘keys’ command with it being possible to add, list or remove them.
The API Key from the BuiltWith account (see here) needs to be added to recon-ng. Once added the module can then be loaded and the detailed information viewed to see what options need setting:

After this the SOURCE option can be set as in the previous example (see section #5 in part 1) and then the module can be ‘run’. Unfortunately there seems to be an error with this module:

7) Interfacing with the Workspace Databases
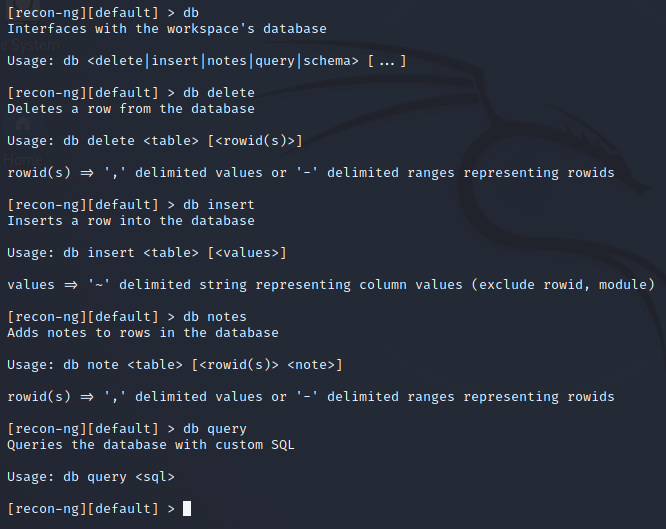
Issuing ‘db’ gives the command description and available options which are delete, insert, notes, query & schema. Running ‘db schema’ lists the tables (13 in total) and includes information such as the table names along with the associated field names & data types:

The full list of database tables within recon-ng is: companies, contacts, credentials, domains, hosts, leaks, locations, netblocks, ports, profiles, pushpins, repositories, vulnerabilities.
The description and usage of each ‘db’ command option can also be shown as follows:
Using the ‘show’ command with a table name we can view the data resulting from running the ‘whois_pocs’ module (see section #5 in part 1):

SQL queries can be run against the current workspace database using the ‘db query’ command:

Following on from the above query example it is also possible to delete rows using the ‘db delete’ command:

Additionally it is possible to add a new row using the ‘db insert’ command whereby each field is prompted for user input:

9) Reporting
In order to generate reports within recon-ng it is necessary to search for and then install the appropriate modules from the marketplace:

For the purpose of these examples we have chosen the modules for outputting reports in CSV and HTML format.
First of all we will load the CSV (Comma Separated Values) reporting module and set the options to include headers and to output the contents of the ‘contacts’ table:

Once the ‘run’ command has been issued then the contents of the CSV file can be view using a shell command:

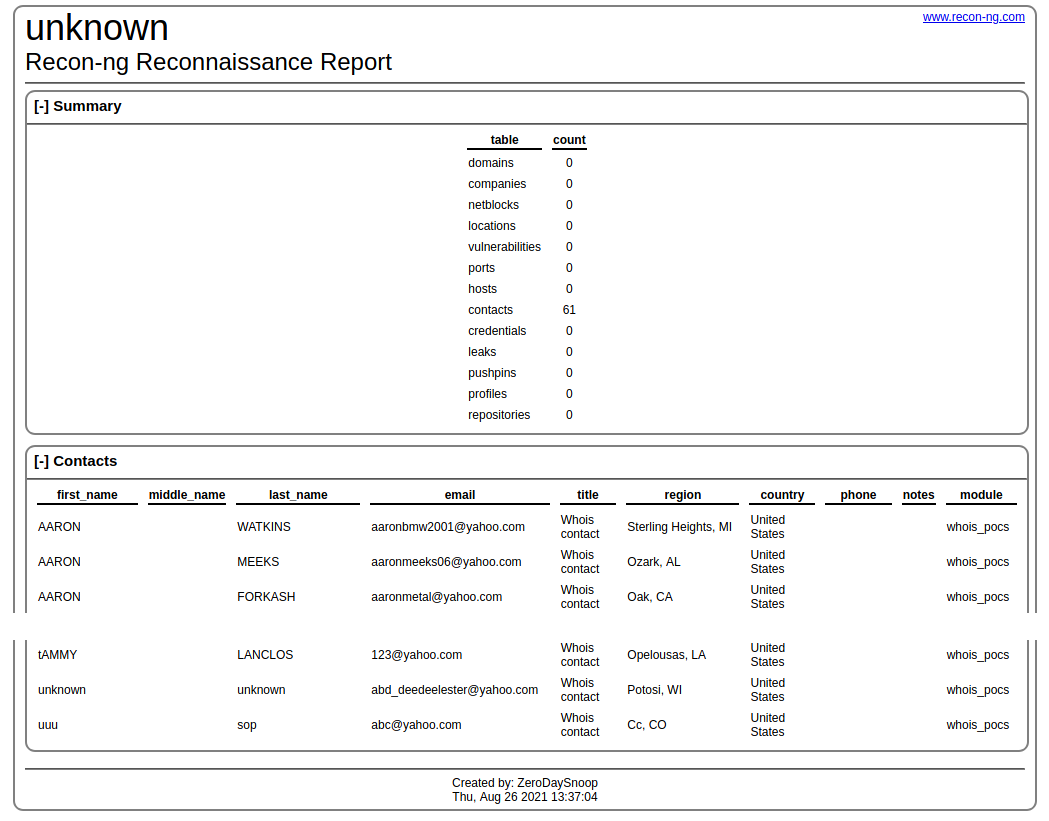
Next we will load the HTML reporting module and set the options:

Once the HTML reporting module has been run then the file can be opened within a web browser. This only includes database tables that contain data i.e. the ‘contacts’ table:
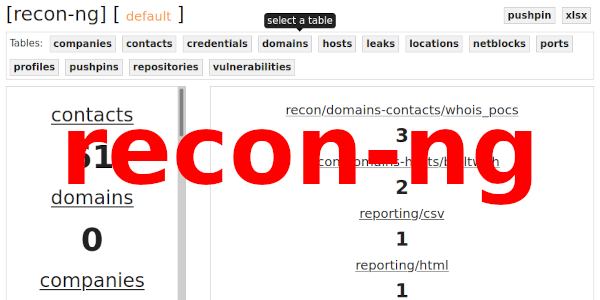
10) Web Interface
In order to access recon-ng via a web browser we first of all need to start the recon-web server from within a CLI (Command Line Interface) terminal:

The URL http://127.0.0.1:5000/ can now be accessed via a web browser:

The home page above shows the following information:
- The header line has the current workspace of ‘default’.
- Below is a series of table buttons which can be clicked to view.
- On the left is a scrollable list of tables with the number of rows.
- On the right are the loaded modules and how many times each has been executed.
Clicking on a table shows the data contents and provides the ability to enable/disable columns as well as a variety of export formats:

Further Information
- Homepage & Download:
- Documentation:
Do you have any experience of using recon-ng? If so please share with us in the comments below your thoughts on this tool.